D2L-39 样式迁移
Published:
本文介绍神经样式迁移如何结合内容图像与样式图像,说明特征提取、内容损失和样式损失的作用,并给出优化合成图像的实现流程。
🎦 本节课程视频地址 👇
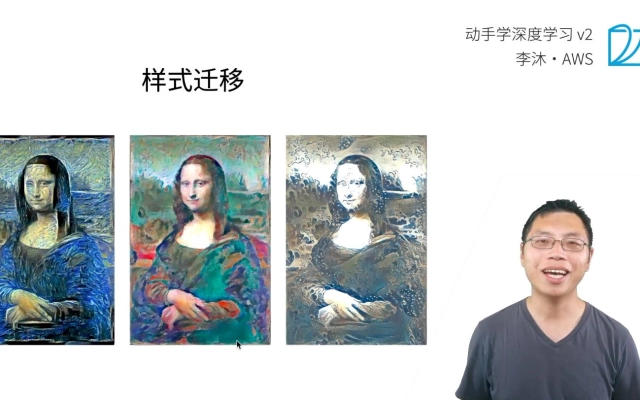
样式迁移(Style Transfer)
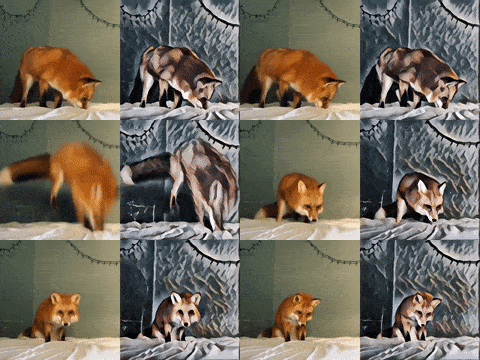
通俗地说叫滤镜
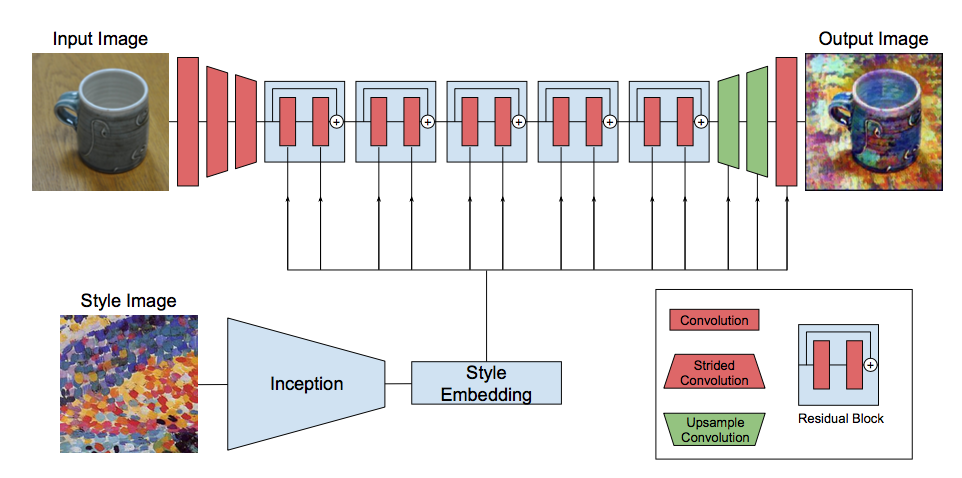
基于CNN的样式迁移
三个平行的神经网络(或者说复制出三个相同的),一个代表内容(原图),一个代表风格(拟合目标),一个是训练(把风格迁移到原图上)
在训练时,使内容和风格训练出的特征在某些层上可以和迁移的训练特征相匹配,希望噪音足够低。
训练目标不是卷积网络的权重,而是最终的风格图。
代码实现
准备工作
%matplotlib inline
import torch
import torchvision
from torch import nn
from d2l import torch as d2l

d2l.set_figsize()
content_img = d2l.Image.open('../data/test_img.jpg')
d2l.plt.imshow(content_img);
rgb_mean = torch.tensor([0.485, 0.456, 0.406])
rgb_std = torch.tensor([0.229, 0.224, 0.225])

def preprocess(img, image_shape):
    transforms = torchvision.transforms.Compose([
        torchvision.transforms.Resize(image_shape),
        torchvision.transforms.ToTensor(),
        torchvision.transforms.Normalize(mean=rgb_mean, std=rgb_std)])
    return transforms(img).unsqueeze(0)
#ToTensor()
#将其先由HWC转置为CHW格式,再转为float后每个像素除以255
#Converts a PIL Image or numpy.ndarray (H x W x C) in the range [0, 255] to a torch.FloatTensor of shape (C x H x W) in the range [0.0, 1.0]
#把每个像素的RGB值放缩到0-1的区间内,方便计算
#mean/std的两组值是在ImageNet上取出来的,也就是说在训练时初始化的方式
def postprocess(img):
    img = img[0].to(rgb_std.device)
    img = torch.clamp(img.permute(1, 2, 0) * rgb_std + rgb_mean, 0, 1)
    #限制在0-1之间
    return torchvision.transforms.ToPILImage()(img.permute(2, 0, 1))

## 模型下载
pretrained_net = torchvision.models.vgg19(pretrained=True)
抽取特征
模型本身不需要训练,所以特征可以通过预训练的模型直接抽取。
style_layers, content_layers = [0, 5, 10, 19, 28], [25]

net = nn.Sequential(*[pretrained_net.features[i] for i in
                      range(max(content_layers + style_layers) + 1)])
    #这里是两个列表相加,+1是取开区间

def extract_features(X, content_layers, style_layers):
    contents = []
    styles = []
    for i in range(len(net)):
        X = net[i](X)
        #对输入按层运算
        if i in style_layers:
            #当在风格对应层提取特征
            styles.append(X)
        if i in content_layers:
            #当在内容对应层提取特征
            contents.append(X)
    return contents, styles

def get_contents(image_shape, device):
    content_X = preprocess(content_img, image_shape).to(device)
    contents_Y, _ = extract_features(content_X, content_layers, style_layers)
    return content_X, contents_Y
    # 抽取内容
def get_styles(image_shape, device):
    style_X = preprocess(style_img, image_shape).to(device)
    _, styles_Y = extract_features(style_X, content_layers, style_layers)
    return style_X, styles_Y
    # 抽取样式

#因为网络不需要反复训练,所以只抽取一次成熟特征,就可以有足够代表性了
定义损失函数
def content_loss(Y_hat, Y):
    #内容损失用均方误差
    return torch.square(Y_hat - Y.detach()).mean()
- 格拉姆矩阵
为计算风格损失,需要通道之间的统计特征。把输入 \(\bf X\) 转换为 \((c,hw)\) 的矩阵,每行就代表一个通道。
\({\bf XX^T}\in\mathbb R^{c\times c}\)中,\(i\) 行 \(j\) 列的元素 \(x_{ij}\) 就是通道 \(i\) 和 \(j\) 向量的内积,代表了两者在风格特征上的相关性。如果 \(hw\) 较大,会使元素值过大,所以需要除以矩阵中的元素个数 \(chw\) normalize。
def gram(X):
    #通道内部的统计信息和通道之间的统计信息
    #一阶统计均值,二阶统计协方差
    num_channels, n = X.shape[1], X.numel() // X.shape[1]
    X = X.reshape((num_channels, n))
    return torch.matmul(X, X.T) / (num_channels * n)

def style_loss(Y_hat, gram_Y):
    return torch.square(gram(Y_hat) - gram_Y.detach()).mean()
    #合成图像与风格图像在风格层的输出
    #style_layers=[0, 5, 10, 19, 28]
- 全变分损失
我们学到的合成图像里面有大量高频噪点,即有特别亮或者特别暗的颗粒像素。 定义全变分损失:
\[\sum_{i,j}\vert x_{i,j}-x_{i+1,j}\vert +\vert x_{i,j}-x_{i,j+1}\vert\]统计每个元素和其相邻行、列的误差绝对值
def tv_loss(Y_hat):
    #降噪的常用方法
    return 0.5 * (torch.abs(Y_hat[:, :, 1:, :] - Y_hat[:, :, :-1, :]).mean() +
                  torch.abs(Y_hat[:, :, :, 1:] - Y_hat[:, :, :, :-1]).mean())
    #试看如何用切片取代循环
content_weight, style_weight, tv_weight = 1, 1e3, 10

def compute_loss(X, contents_Y_hat, styles_Y_hat, contents_Y, styles_Y_gram):
    # 分别计算内容损失、风格损失和全变分损失
    contents_l = [content_loss(Y_hat, Y) * content_weight for Y_hat, Y in zip(
        contents_Y_hat, contents_Y)]
    styles_l = [style_loss(Y_hat, Y) * style_weight for Y_hat, Y in zip(
        styles_Y_hat, styles_Y_gram)]
    tv_l = tv_loss(X) * tv_weight
    # 对所有损失加权求和
    l = sum(10 * styles_l + contents_l + [tv_l])
    return contents_l, styles_l, tv_l, l
初始化图像
在风格迁移中,合成的图像(里的像素)是训练期间唯一需要更新的变量。
class SynthesizedImage(nn.Module):
    def __init__(self, img_shape, **kwargs):
        super(SynthesizedImage, self).__init__(**kwargs)
        self.weight = nn.Parameter(torch.rand(*img_shape))

    def forward(self):
        return self.weight

def get_inits(X, device, lr, styles_Y):
    gen_img = SynthesizedImage(X.shape).to(device)
    gen_img.weight.data.copy_(X.data)
    #最开始完全用X的内容
    trainer = torch.optim.Adam(gen_img.parameters(), lr=lr)
    styles_Y_gram = [gram(Y) for Y in styles_Y]
    #每一层的风格损失
    return gen_img(), styles_Y_gram, trainer
训练函数
def train(X, contents_Y, styles_Y, device, lr, num_epochs, lr_decay_epoch):
    X, styles_Y_gram, trainer = get_inits(X, device, lr, styles_Y)
    scheduler = torch.optim.lr_scheduler.StepLR(trainer, lr_decay_epoch, 0.8)
    animator = d2l.Animator(xlabel='epoch', ylabel='loss',
                            xlim=[10, num_epochs],
                            legend=['content', 'style', 'TV'],
                            ncols=2, figsize=(7, 2.5))
    for epoch in range(num_epochs):
        trainer.zero_grad()
        contents_Y_hat, styles_Y_hat = extract_features(
            X, content_layers, style_layers)
        contents_l, styles_l, tv_l, l = compute_loss(
            X, contents_Y_hat, styles_Y_hat, contents_Y, styles_Y_gram)
        l.backward()
        trainer.step()
        scheduler.step()
        if (epoch + 1) % 10 == 0:
            animator.axes[1].imshow(postprocess(X))
            animator.add(epoch + 1, [float(sum(contents_l)),
                                     float(sum(styles_l)), float(tv_l)])
    return X